Room thermostat II 230 V help
Questions about your Room thermostat II 230 V?
Questions about your Room thermostat II 230 V? You can find installation videos, instructions and answers to frequently asked questions here.
Room Thermostat II 230V - Installation
Room Thermostat II 230V - Installation
What does error code E04 mean?
Error code E04 on the Room Thermostat II 230V indicates a fault with the external temperature sensor.
Troubleshooting steps
Check the external temperature sensor:
Are you using an external temperature sensor (e.g., floor sensor or outdoor temperature sensor)?
If so, make sure that the temperature sensor is connected correctly and has the correct technical specifications.
Check settings:
If no external temperature sensor is used:
Go to the device settings of the Room Thermostat II 230V.
Change the sensor connection setting to “Not used.”
These steps will allow you to resolve error code E04.
### Room thermostat II / Room thermostat II 230 V is shown as unavailable after restarting the Smart Home Controller
If your Room thermostat II or Room thermostat II 230 V is shown as unavailable after restarting the Smart Home Controller, you can take the following steps:
Be patient:
The Room thermostat II is still functional.
It may take a few minutes for the Room thermostat II to reconnect to the Smart Home Controller.
Check connection:
Make sure the Smart Home Controller is turned on and connected to the network.
Check if the Room thermostat II is powered.
Restart the Room thermostat II:
Turn off the Room thermostat II / Remove the batteries and turn the device back on.
Wait a few minutes for the connection to be re-established.
Firmware updates:
Check if there are firmware updates for the Smart Home Controller or the Room thermostat II.
Perform the necessary updates if applicable.
If the problem persists, please contact
for further assistance.### Using the sensor input on the Bosch Smart Home Room thermostat II 230 V
The sensor input on the Room thermostat II 230 V enables the connection of an external temperature sensor. Here is the most important information:
#### External temperature sensor
Type: NTC 10 kOhm
Use: Can be used as a floor sensor to measure the temperature at a different location, such as the floor.
#### Optional accessories
The temperature sensor cable of type NTC 10 kOhm is available in the Bosch Smart Home e-shop.
By connecting an external sensor, you can make temperature measurement more flexible and adapt it to your needs.
### Protection against moisture and water: Bosch Smart Home Room thermostat II
#### Bosch Smart Home Room thermostat II (Battery):
Protection class: IP 20
First digit "2": Protected against solid foreign objects with a diameter of less than 12.5 mm and against access with a finger.
Second digit "0": No protection against water and moisture.
#### Bosch Smart Home Room thermostat II 230 V:
Protection class: IP 21
First digit "2": Protected against solid foreign objects with a diameter of less than 12.5 mm and against access with a finger.
Second digit "1": Protected against vertically falling dripping water.
#### Installation notes:
Room thermostat II (Battery) (IP 20):
Do not install in damp or wet environments.
Suitable for dry indoor spaces.
Room thermostat II 230 V (IP 21):
Can be installed in environments where it is occasionally exposed to vertically falling dripping water.
Not suitable for use in areas with high humidity or direct water contact.
#### Summary:
The Room thermostat II is not protected against water and moisture and should only be used in dry indoor spaces.
The Room thermostat II 230 V offers limited protection against vertically falling dripping water and can be installed in slightly humid environments, but not in areas with high humidity or direct water contact.
### Instructions for Installing the Bosch Smart Home Room thermostat II 230 V
#### Important Notes on Mounting
The installation of the Bosch Smart Home Room thermostat II 230 V must be carried out carefully and in accordance with the instructions in theQuick Start Guide. Here are the most important notes on mounting:
1. Quick Start Guide:
All necessary steps for installation can be found in the Quick Start Guide included with the device.
Read the guide carefully before starting the installation.
2. Qualified electrician required:
Installation may only be carried out by a qualified electrician.
3. Important steps for installation:
Preparation:
Switch off power supply: Switch off the power supply before starting the installation.
Have tools and materials ready: Ensure that all required tools and materials are ready.
Connections:
Connect cables: Connect the cables according to the instructions in the Quick Start Guide.
Use bridge: Use the included bridge when connecting 230V actuators.
Mounting:
Attach Room thermostat II 230 V: Attach the Room thermostat II 230 V to the designated location. Ensure that the device is mounted firmly and securely.
Verification:
Check connections: Check all connections and ensure they are correct and secure.
Switch on power supply: Switch the power supply back on and test the Room thermostat II 230 V for proper function.
Note:
Correct installation by a qualified electrician is crucial for the safe operation of the Room thermostat II 230 V. Follow the instructions in the Quick Start Guide exactly.
If your Room thermostat II 230 V is not working in one room, there can be various causes. Here are some steps you can check and adjust:
1. Check wiring:
Have the connections on the Room thermostat II 230 V checked by a qualified electrician for correct wiring.
Faulty wiring can cause the thermostat to not function properly.
2. Use of the bridge:
When using 230V actuators, ensure that the included bridge is installed correctly.
The bridge is necessary to ensure the proper function of the actuators.
3. Observe maximum switching capacity:
Check whether the connected devices do not exceed the maximum ohmic switching capacity of 3 A.
An overload can cause the thermostat to not work properly.
4. Electrical problems:
Have the entire electrical installation in the affected room checked by a qualified electrician.
Possible electrical problems such as defective lines or fuses can impair the function of the thermostat.
### Bosch Smart Home Room thermostat II 230 V: Mounting Instructions
No, the Bosch Smart Home Room thermostat II 230 V cannot be accidentally mounted the wrong way around. The display is only readable in the correct orientation.
#### Mounting Instructions:
Mounting the flush-mounted unit:
Refer to the labeling on the flush-mounted unit to ensure correct orientation.
Attaching the control unit:
Pay attention to the guide elements on the flush-mounted unit.
Proceed carefully to avoid damage to the back.
Careful mounting ensures optimal function and readability of the Bosch Smart Home Room thermostat II 230 V
### How to determine the valve type of your underfloor heating
Ask your heating installer:
Your heating installer can tell you the exact valve type.
Check the type plate:
Look for the type plate of your valve in the heating circuit distributor. There you will find the required information.
Test the valve type:
Connect the Room thermostat II 230 V.
Set the temperature to maximum and wait several minutes.
If it gets warm, you have the correct valve type.
If it does not get warm, change the valve type in the device settings of the Bosch Smart Home App (normally closed/open) and test again.
#### Important note:
Make sure you configure the correct settings to ensure optimal operation of your underfloor heating.
### Instructions for setting the valves for your underfloor heating
Before connecting to the Smart Home Controller:
Press the control dial of the Room thermostat II 230 V for at least 3 seconds to access the configuration menu.
Set the valve type or change it as needed.
For more details, refer to the installer mode in the quick guide on page 15.
After connecting to the Smart Home System:
Open the Smart Home App.
Go to the thermostat's device settings.
Adjust the valve settings at any time via the app.
Note:
Make sure you have the quick guide at hand to use the installer mode correctly.
### Compatibility of the Bosch Smart Home Room thermostat II 230 V with underfloor heating systems
The Bosch Smart Home Room thermostat II 230 V is compatible with most underfloor heating systems, however there are some requirements:
#### Water-based underfloor heating systems
Compatibility: These can be connected without any problems, provided you use actuators.
#### Electric underfloor heating systems
Compatibility: These are also compatible, as long as the maximum switching load of 3 amperes is not exceeded.
Recommendation:For electric underfloor heating systems, we additionally recommend the use of a floor sensor as a protective function.
Please ensure that your underfloor heating system meets these requirements to guarantee smooth operation.
### Replacing a Surface-Mounted Thermostat with the Bosch Smart Home Room thermostat II 230V
Yes, an existing surface-mounted thermostat can be replaced with the Bosch Smart Home Room thermostat II 230 V, under the following conditions:
#### Requirements:
Flush-mounted box: A flush-mounted box with a depth of at least 35 mm must be available.
Professional installation: The installation may only be carried out by a qualified electrician.
#### Note:
No flush-mounted box available? If no suitable flush-mounted box is available, a qualified electrician can also assist you.
This ensures that the replacement is carried out safely and correctly.
### Using the Bosch Smart Home Room thermostat II 230V with 24V actuators
Yes, you can also use the Bosch Smart Home Room thermostat II 230V for 24V actuators.
#### Please note the following points:
- No bridge: No bridge may be installed between the connection terminals COM and NO in 24V operation.
- Supply voltage: The supply voltage remains at 230V.
- Neutral conductor: A neutral conductor must be present.
Important: The installation of the Room thermostat II 230V must be carried out by a qualified electrician.
Room Thermostat II 230V - Operations
Room Thermostat II 230V - Operations
### Historical Data for Room thermostat II and Room thermostat II 230 V
#### Bosch Smart Home App
Currently, the Bosch Smart Home App does not display historical data for the Room thermostat II and Room thermostat II 230 V.
#### Alternative: Third-Party Apps
Apple HomeKit
Home Assistant
These third-party apps often offer the ability to display historical data as a chart or list.
Please note that the availability and accuracy of the data depends on the respective third-party app.
### Activating the child lock on the Room thermostat II / Room thermostat II 230 V
You can activate the child lock of your Room thermostat II / Room thermostat II 230 V in two ways: via the Bosch Smart Home App or directly on the device.
1. Activation via the Bosch Smart Home App:
Follow these steps:
Open the Bosch Smart Home App.
Go to the device settings.
Select the corresponding Room thermostat II / Room thermostat II 230 V.
Set the "Child lock" option to "on".
2. Activation directly on the device:
Follow these steps:
Press the system button on the room thermostat for 3 seconds.
Keep the button pressed until the display shows "LCK".
The child lock is now activated.
### Meaning of the pause symbol in the display of the room thermostat II / room thermostat II 230V
#### What does the pause symbol indicate?
The pause symbol in the display of the room thermostat II / room thermostat II 230V indicates that the valve is being closed and heating control is no longer taking place. This occurs, for example, when the "heating pause" is active in the "Climate Manager" service.
#### Functions during the heating pause
Heating pause: When the heating pause is activated, the valve is closed and heating control is paused. This helps to save energy when heating is not needed.
Frost protection function: Despite the heating pause, the frost protection function remains active. This function prevents the room temperature from falling below a certain value to avoid frost damage.
Anti-calcification protection: The anti-calcification protection also remains active during the heating pause. This function ensures that the valve is moved regularly to prevent calcification and maintain functionality.
These functions ensure that your room thermostat II works optimally and remains protected even during the heating pause.
### View humidity with the Bosch Room thermostat II and II 230 V
Requirements:
A Bosch Room thermostat II or Room thermostat II 230 V
The Bosch Smart Home App
Installation:
Make sure that the Room thermostat II is correctly installed and connected to your Bosch Smart Home System.
Measured value display:
Directly on the device: The measured humidity is displayed on the display of the Room thermostat II.
In the Smart Home App: You can also view the humidity in the Bosch Smart Home App under the room overview.
This way you always have the humidity in view and can ensure a pleasant room climate.
###Different measured values for Room thermostat II 230 V and Twinguard
It is possible that the Room thermostat II 230 V, the Room thermostat II and the Twinguard measure different temperatures and humidity levels in the same room. Here are the reasons for this:
####1. Different positions in the room
Ceiling, wall, window, doors: The devices may be located at different positions in the room. Temperature and humidity can vary depending on proximity to windows, doors or radiators.
####2. Measurement tolerances
Device-specific tolerances: Each device has its own measurement tolerances. These small deviations can lead to different measured values.
####3. Local conditions
Air circulation and heat sources: Different air circulation and heat sources in the room can influence the measured values. For example, a device near a radiator can measure higher temperatures.
### Activate and deactivate heating pause on Room Thermostat II / Room Thermostat II 230V
#### What is the heating pause?
The heating pause is a function that allows you to temporarily turn off the heating in individual rooms. This is particularly useful during the warmer months, such as in summer.
#### How do I activate or deactivate the heating pause?
Open the Bosch Smart Home App.
Go toMenu.
SelectServices.
Go toClimate Manager.
SelectHeating Pause & Cooling.
Activate or deactivate the heating pause for the desired room.
#### What happens when the heating pause is activated?
Display: A pause symbol appears on the display of the corresponding Room Thermostat II. A notification is also displayed in the Smart Home App.
Function: The Room Thermostat II or Room Thermostat II 230V is turned off. This means that the heating in this room is no longer active.
Scenarios and Automations: These ignore the temperature settings for the room in which the heating pause is activated.
#### Why use the heating pause?
Save energy: Avoid unnecessary heating during the summer months.
Comfort: Adjust the heating control to your needs.
Use the heating pause to reduce your heating costs and increase comfort in your home.
### Activating the lighting on the Bosch Smart Home Room thermostat II
To activate the lighting on your Bosch Smart Home Room thermostat II or Room thermostat II 230 V, proceed as follows:
Room thermostat II: Press the system button on the control unit briefly.
Room thermostat II 230 V: Press or turn the system button on the control unit briefly.
### Heating systems with cooling function
The "Cooling" operating mode can be used under the following conditions:
#### Requirements for the cooling function
Underfloor heating:
Your heating system must be an underfloor heating system.
Heat pump:
The underfloor heating must be operated in conjunction with a heat pump.
The heat pump must support a cooling function.
#### Important note
Ensure that both your underfloor heating and the heat pump provide the required functions to use the cooling function of the Room thermostat II 230 V.
### Operating the Room thermostat II 230 V without Bosch Smart Home Controller II
Yes, you can use the Room thermostat II 230 V without the Bosch Smart Home Controller II.
#### Notes on operation
- **Installer mode**: Please refer to the instructions for "Installer mode" on page 12 of the enclosed quick guide.
- **Settings**: In installer mode, you can make basic settings directly on the device.
#### Important note
Operation without the Smart Home Controller offers basic functions. However, some advanced functions are not available.
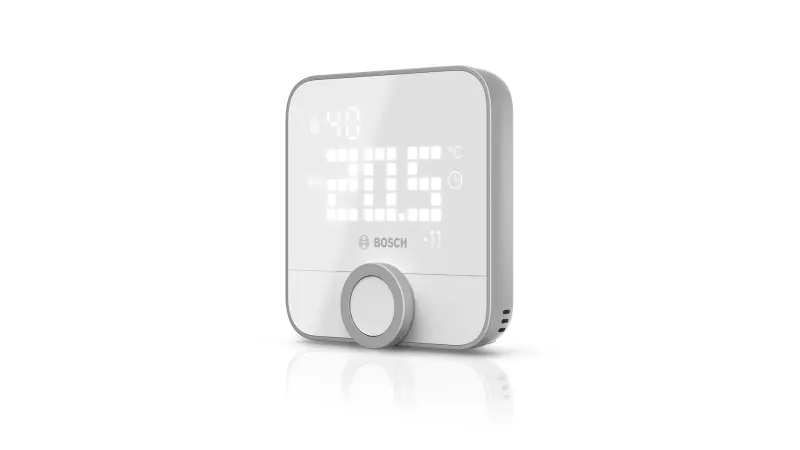
#### Temperature display on the display of the Room thermostat II 230 V
##### Standard display:
ACTUAL temperature: The display shows the measured ACTUAL temperature by default. This is the current room temperature.
##### Setting the SET temperature
SET temperature: Turn the control dial on the Room thermostat II 230 V to set the desired SET temperature. This target temperature is briefly displayed and then switches back to the ACTUAL temperature.
##### Important note
ACTUAL temperature: Displays the current room temperature.
SET temperature: Is the target temperature you have set.
### Setting the heating device type for your Room thermostat II 230 V
You can set the heating device type in two ways:
Installation wizard in the Bosch Smart Home App:
Use the installation wizard during initial setup to define the heating device type.
This will guide you step by step through the process and help you define the correct heating device type.
Device configuration page in the Bosch Smart Home App:
Open the Bosch Smart Home System App.
Navigate to the device configuration page of the Room thermostat II 230 V.
Set the heating device type there.
These methods ensure that your room thermostat is correctly configured with your heating device type.
### Bosch Smart Home Room thermostat II 230 V reset to factory settings
To reset your Room thermostat II 230 V to factory settings, please follow these steps:
Remove control unit:
Carefully remove the control unit from the flush-mounted component.
Keep control wheel pressed:
When reinserting the control unit, keep the control wheel pressed.
Wait until "RES" appears on the display.
Release control wheel and press again:
Release the control wheel.
Press the control wheel again until the LED strip on the Room thermostat II flashes green.
Restart:
The Room thermostat II 230 V will then restart and is reset to factory settings.
Your Room thermostat II 230 V is now ready for a new configuration.
### Video instructions
Please also refer to the reset instructions on the Bosch Smart Home YouTube channel
### Room thermostat II 230 V: Troubleshooting
If your Bosch Smart Home Room thermostat II 230 V is not reachable or not functioning, you can perform the following troubleshooting steps:
1. Check the display:
Look for error messages on the device's display, such as the connection status using the radio symbol.
Follow the corresponding instructions in the enclosed operating manual.
2. Check the Bosch Smart Home App:
Open the favorites overview in the Smart Home App
Look for error messages and follow the instructions there.
3. Check the power supply:
If the display of the Room thermostat II 230 V no longer shows anything and provides no further information, the power supply may be interrupted.
Check the power supply and ensure that the Room thermostat II 230 V is correctly connected.
Note: The 230V connection may only be checked by an authorized electrician.
A careful review of these points can help to quickly identify and resolve the problem.
### Underfloor heating is not getting warm: What can I do?
If your underfloor heating does not produce noticeable heat after several hours and the settings for the valve type on the Underfloor-heating room thermostat 230V are correct, there are several steps you can take:
Check the settings:
Make sure that the actuators on the underfloor heating are set correctly.
Check whether the heating circuits are open.
Check the heating system:
Make sure that the heating system is functioning properly and that there are no malfunctions.
Perform a visual inspection to check whether the valves are correctly opened and closed according to the settings on the Underfloor-heating room thermostat 230V
If these steps do not help, we recommend contacting a heating specialist. An expert can investigate the problem more closely and carry out the necessary inspections.
#### Problem: Heating remains cold despite SET value adjustment
When you increase the SET value via a radiator thermostat or a room control in another room, the heating remains cold. The problem is that the heat demand, which is determined via the connected Bosch Smart Home radiator and room thermostats, is not taken into account by your central heating system.
#### Goal: Control central heating based on heat demand
With the Bosch Smart Home Room thermostat II 230V, you want to control your central heating system so that the heat demand in all rooms of your home is taken into account. This requires the "Central heating control" function.
#### Requirements:
For the central heating control to work, you need:
- Bosch Smart Home Controller
- Bosch Smart Home App
- Bosch Smart Home Room thermostat II 230V, configured with the heating device type "Central heating" and connected to your heat generator.
- Radiator and room thermostats II that are connected to the Bosch Smart Home system.
#### Step-by-step instructions
##### 1. Check settings
Open theBosch Smart Home App.
Go toDevice managementand select the Room thermostat II 230V that controls your heat generator.
Make sure that the heating device type is set to"Central heating" .
##### 2. Activate central heating control
Navigate in the app toServices→Climate manager→Central heating control.
Activate the"Central heating control" function for your Room thermostat II 230V.
##### 3. Link rooms
Select the rooms whose radiator and room thermostats II should be linked to the central heating system.
#### Benefits of central heating control
The set SET temperature in individual rooms is now automatically taken into account for heating control throughout the Bosch Smart Home system.
The heat generator (e.g. boiler or floor heating) is switched on or off as needed to achieve the desired temperature in all rooms.
With these settings, your central heating system is optimally adjusted to the heat demand of your Bosch Smart Home system.
Room Thermostat II 230V - General Information
Room Thermostat II 230V - General Information
### Radio Protocol of the Bosch Smart Home Room thermostat II and Room thermostat II 230 V
Radio standard:
The Room thermostat II and the Room thermostat II 230 V communicate with the Bosch Smart Home Controller via the Zigbee radio standard (2.4 GHz).
Requirements:
A Bosch Smart Home Controller
A stable Zigbee connection between the Room thermostat II and the Controller. Can be optimized, for example, by the Bosch Smart Home compact plug-in switch.
Advantages of Zigbee:
Energy-efficient: Zigbee is known for its low energy consumption, which extends the battery life of the devices.
Reliable: Zigbee offers a stable and secure connection for your Smart Home devices.
Expandable: You can easily expand your Zigbee network by adding more compatible devices.
Both second-generation room thermostats offer reliable and wireless communication with your Bosch Smart Home System to ensure a comfortable and well-regulated room climate.
### Differences between Room thermostat II 230 V and Room thermostat II (battery)
#### Functions:
Room thermostat II 230 V:
Requires a 230V power supply.
Features a switching actuator (relay) to control climate systems with wired control (with and without potential).
Displays the measured humidity on the display and in the Bosch Smart Home App.
Room thermostat II:
Is powered by 4x AAA batteries.
Does not have its own relay (no switching actuator).
Can only send information to other smart devices wirelessly via the controller.
Also displays the measured humidity on the display and in the Bosch Smart Home App.
#### Requirements for operation in the Bosch Smart Home System:
Room thermostat II 230 V:
A 230V power supply must be available.
Suitable for controlling climate systems with wired control.
Room thermostat II:
Requires 4x AAA batteries.
Works wirelessly and communicates with other smart devices via the controller.
Both Room thermostat II models offer an easy way to monitor humidity and create a comfortable indoor climate.
### Connecting the Bosch Smart Home Room thermostat II 230V with Bosch EasyControl
No, a connection of the Bosch Smart Home Room thermostat II 230 V with Bosch Easy Control from Bosch Home Comfort is currently not possible for technical reasons.
#### Important information:
Device compatibility:The Bosch Smart Home Room thermostat II 230V is not compatible with Bosch EasyControl.
Technical limitations: The connection of the two systems is not possible due to technical differences.
### Bosch Smart Home Room thermostat II 230 V does not switch off
If your Room thermostat II 230 V does not switch off, there may be various causes. Here are some steps you can check and adjust:
#### 1. Valve type setting:
Check the setting for the valve type (normally open/normally closed) in the Bosch Smart Home App.
Make sure that the setting corresponds to the heating device type.
How to change the setting:
Open the Bosch Smart Home App.
Navigate to the device settings and select the corresponding Room thermostat II 230 V.
Check and change the setting for the valve type accordingly.
#### 2. Check wiring:
Have the wiring on the Room thermostat II 230 V and on the actuator checked by a qualified electrician.
Faulty wiring can cause the Room thermostat II 230 V to not switch off correctly.
#### 3. Visual inspection of the valve:
Perform a visual inspection of the valve, especially if you are using actuators.
Check the valve for possible defects that could prevent it from switching off.
#### 4. Check cooling mode:
Make sure that cooling mode has not been accidentally activated.
Cooling mode can affect the behavior of the Room thermostat II 230 V and prevent it from switching off.
#### Important note:
Work on the 230V power supply may only be carried out by authorized qualified electricians.
The "Heating device type" setting in the Bosch Smart Home App adjusts the parameters and control for different heating systems. Here are the details for each heating device type
Boiler (Potential-free):
This setting is intended for boilers that require potential-free switching.
The app adjusts the parameters and control accordingly to ensure optimal control of the boiler.
Floor heating (or other 230V application):
This setting is suitable for floor heating or other 230V applications.
The app adjusts the parameters to take into account the specific requirements of floor heating, such as the longer heating-up time.
Radiator (pure radio application):
This setting is intended for radiators where the switching output is not used.
Control is performed purely via radio, without activating the switching output of the Room Thermostat II.
Settings:
Bosch Smart Home App:
Open the Bosch Smart Home App.
Navigate to the device settings and select the corresponding room thermostat.
Select heating device type:
In the room thermostat settings, you will find the "Heating device type" option.
Select the appropriate heating device type (Boiler, Floor heating, Radiator) to adjust the parameters and control accordingly.
### Temperature adjustment for the Room thermostat II 230 V
Yes, a temperature adjustment is possible with the Room thermostat II 230 V, similar to the Bosch Smart Home radiator thermostats.
#### Functions of the temperature adjustment:
Compensation of temperature differences:
The temperature adjustment makes it possible to compensate for differences between the measured values on the room thermostat and a reference sensor.
This ensures more accurate temperature control and increases comfort.
#### Settings:
To set up the temperature adjustment, follow these steps:
Bosch Smart Home App:
Open the Bosch Smart Home App.
Navigate to the device settings and select the corresponding Room thermostat II 230 V under "Room thermostats".
Set up temperature adjustment:
In the settings of the selected Room thermostat II 230 V, you will find the option for temperature adjustment.
Adjust the temperature adjustment according to your needs to calibrate the measured values.
This ensures that your room thermostat measures and displays the temperature precisely.
When setting heating times and heating profiles for the Underfloor-heating room thermostat 230V, you should consider the specific characteristics of your heating system, especially if you are using underfloor heating.
#### Important Points:
Consider heat-up time:
Underfloor heating systems require more time to heat up a room due to their energy-efficient nature.
Plan for this longer heat-up time when setting heating times or heating profiles in the Bosch Smart Home App.
Timer and heating profiles:
Use the timer function in the Bosch Smart Home App to store different heating times and heating profiles.
Ensure that the heating times start early enough to bring the room to the desired temperature in time.
#### Settings:
Bosch Smart Home App:
Open the Bosch Smart Home App and navigate to the settings for heating times and heating profiles.
Set the desired times and temperatures, taking into account the longer heat-up time of the underfloor heating.
Individual customization:
Customize the heating times and profiles individually to your needs and the specific room.
Test the settings and adjust them as needed to ensure optimal comfort.
#### Notes:
By considering the longer heat-up time of underfloor heating, you can ensure that your rooms are comfortably warm at the desired time without wasting unnecessary energy.
### Maximum switching capacity of the Bosch Smart Home Room thermostat II 230 V
#### Switching capacities
Resistive load:
Can switch up to 3 A.
Inductive load:
Can switch up to 1 A.
#### Details on switching capacity
Resistive load: Resistive loads are electrical loads where current and voltage are in phase, such as heating wires.
Inductive load: Inductive loads are electrical loads where current lags behind voltage, such as motors or transformers.
#### Requirements:
Ensure that the connected devices do not exceed the above-mentioned switching capacities to guarantee safe and efficient operation of the room thermostat.
### "Fast heating" function in the Bosch Smart Home App
No, the "fast heating" function in the Bosch Smart Home App is designed for the smart Bosch Smart Home radiator thermostats and does not work with the Room thermostat II 230 V.
#### Details about the function:
The "fast heating" function is specifically designed for the smart radiator thermostats from Bosch Smart Home.
This function is not available for the Bosch Smart Home Room thermostat II 230 V.
The Room thermostat II 230 V has a ventilation detection feature called "Temperature drop". The settings for this can be configured in the Climate Manager of the Bosch Smart Home App.
### Temperature drop detection:
The Room thermostat II 230 V detects a rapid temperature drop within a specific time period.
If the temperature drops by a certain number of degrees, this is recognized as ventilation.
Notification and/or heating shutdown:
You can choose whether to receive a notification, have the heating automatically turned off, or both.
#### Advanced ventilation detection with door/window contacts:
Fast and reliable detection:
In combination with Bosch Smart Home door/window contacts, an open window is detected quickly and reliably.
Automatic heating shutdown:
When an open window is detected by the door/window contact, the heating in the corresponding room is automatically turned off.
Requirements:
For the advanced functionality, Bosch Smart Home door/window contacts must be installed.
### Details on using the Bosch Smart Home Room thermostat II 230 V
#### Control of actuators:
The Room thermostat II 230 V controls one or more actuators on the existing heating circuit distributor.
In "Central heating" mode, the Room thermostat II 230 V can detect the heating demand of Bosch Smart Home Radiator thermostat II and switch on a connected boiler or floor heating system.
#### Multiple heating loops:
In some systems, multiple heating loops can be controlled via one actuator, which do not necessarily have to run in the same room. An example of this is an open ground floor without partition walls.
#### Heating loops across multiple rooms:
It is theoretically possible to run a heating loop across multiple rooms. An example of this is an open kitchen subsequently separated from the living room by a wall.
#### Note:
The control of heating circuits across room boundaries is only possible with the structural configurations described.
### Installation of the Bosch Smart Home Room thermostat II 230V in switch frames
Can the thermostat be installed in switch series?
No, the Bosch Smart Home Room thermostat II 230V cannot be installed in switch series.
#### Why is this not possible?
Product dimensions: The Bosch Smart Home Room thermostat II 230V has external dimensions of 86 x 87 mm. This size is not compatible with most switch series.
#### Important information:
Installation: The Room thermostat II 230V is designed for wall mounting and does not fit into standardized switch frames.
Requirements: Ensure that the intended installation location provides sufficient space.
Please note this information to ensure a smooth installation.
Get in touch with us.
A personal and professional service is important to us. If you have any questions or need professional personal support, please do not hesitate to contact us.